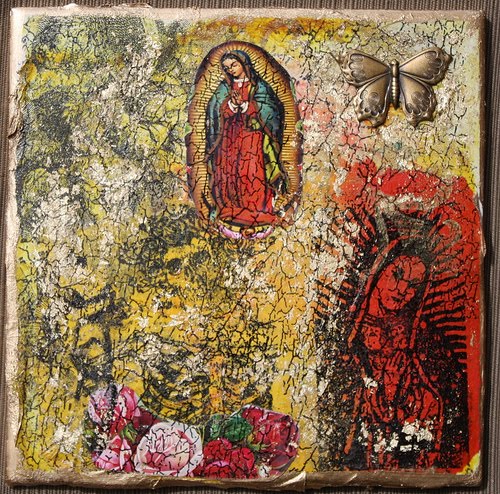
at my new blog sight!
click here, and add me while you are at it!
Showing posts with label tutorial. Show all posts
Showing posts with label tutorial. Show all posts
Wednesday, October 15, 2008
Sunday, October 5, 2008
Easy Encaustic Wax Tutorial. (You know how I do!)
Encaustic painting, also known as hot wax painting, involves using heated beeswax to which colored pigments are added. The liquid/paste is then applied to a surface — usually prepared wood, though canvas and other materials are often used.
The simplest encaustic mixture can be made from adding pigments to beeswax, but there are several other recipes that can be used — some containing other types of waxes, damar resin, linseed oil, or other ingredients. Pure, powdered pigments can be purchased and used, though some mixtures use oil paints or other forms of pigment.
Metal tools and special brushes can be used to shape the paint before it cools, or heated metal tools can be used to manipulate the wax once it has cooled onto the surface. Today, tools such as heat lamps, heat guns, and other methods of applying heat allow artists to extend the amount of time they have to work with the material. Because wax is used as the pigment binder, encaustics can be sculpted as well as painted. Other materials can be encased or collaged into the surface, or layered, using the encaustic medium to adhere it to the surface.
***********************************************************************************
Yeah, who has time for that, or for the mess? I know I don't, so lets get this party started, shall we?
Materials and supplies.
Natural Bees wax: You can find this at Michaels or Joanns in the candle section. Make sure you get clear, and because I like to save my "skrilla" use a coupon. They are always putting out weekly coupons.
Crayons: Here is where I don't skimp out. Crayola shoves in lots of pigment in their crayons. They are not that much more expensive than a generic brand. Trust me, they make a difference.
Quilting Iron: Again, use a coupon people! These run around 30.00. They are so worth it too, because they get super hot and they are small and great for small projects. Oh, and you can use them for quilting too.
Newspaper: Great for absorbing drips and cleaning your tool
Gift Wrap Tissue Paper: You know, the kind you dress up your gift bags with. Dollar store carries it, and so does the rest of america.
Gift Car, Collage, painting,tag,: anything you want to seal up. I sealed wood, paper, and canvas. For demonstration purposes, I am using a Christmas card.

Step 1: I like to get my iron nice and hot, and I set it on high. Be very careful, you can easily burn yourself. After it is nice and hot, I apply the iron directly on my slab of wax, till it starts dripping on my card. I let it drip all over

See the drips? Kinda looks nasty, but I won't even go there......
 After you have a fair amount of wax on your card, start rubbing your iron all around your card to melt and smooth out your wax droppings. Have fun, this is the most theraputic part, I can swirl around for hours. If you get to much on one side, you can remelt it and move it around.
Wanna be daring and add some color? Get your crayon and apply it to your iron the same way you did with your bees wax. Use your crayon sparingly! Crayolas put out lots of color and you depending on the size of your piece, you may only need one or two drops. Again, if you have too much color, you can always move it around by melting it and spreading it elsewhere

Here, I added about 4 different colors.

After your piece cools a bit, it is ready to buff out. Using your tissue paper,(thanks for the tip, Krissi, I agree this works best!) bunch it up and rub gently a few times over your piece, and you will notice a nice sheen. You don't have to do this step if you don't want too, but since I like my stuff shiny, I buff away. :-)

Here are three pieces that I sealed in wax. They are going to be part of my RAK Swap challenge that I blogged about previously. (click on link and join my RAK flickr group)
How easy was that? Oh, and you could really go crazy with this technique. try embedding small objects, glitter, tissue papers, anything! I swear, this is so much fun, you will be dreaming about sealing up anything. I may even seal my bills! haha. (I wish)
Anyhoo, if you enjoyed this tutorial, do tell a friend!

Whoops, lemme tell you about clean up. EAZY! While your iron is still hot, wipe off excess wax on newspaper, It will come right off and be just like new. I think this is way easier than cleaning out a crock pot full of wax and having those brushes full of wax.

Saludos!
Yoli
Tuesday, September 16, 2008
Easy Chica Style Necklace Pendant Tutorial
Hey Chica's in Craft. It is time for another easy breezy Tutorial. I actually made this project for a swap partner, and I liked it so much, I decided to make one for myself. You can keep this as simple as 123, or you can go as elaborate as you want. I am going to keep this tutorial on the simple side, and if you do make your own pendant, feel free to link it here.
Materials:
Crafty Chica Mojito Paper
Crafty Chica Loteria Cards
Inkssentials Memory Glass and Pendant frames
Decorative paper
Tools:
Scissors
Glue stick
punch cutters (optional) I have a square punch that I used to cut my paper to size
Pick an image to go in the front and in the back of your pendant. I cut out a calavera from Kathy's loteria card, and I cut out an image of Frida for the backside. I also chose a glittered paper for the background of my calavera.
Crafty Chica Mojito Paper
Crafty Chica Loteria Cards
Inkssentials Memory Glass and Pendant frames
Decorative paper
Tools:
Scissors
Glue stick
punch cutters (optional) I have a square punch that I used to cut my paper to size
Pick an image to go in the front and in the back of your pendant. I cut out a calavera from Kathy's loteria card, and I cut out an image of Frida for the backside. I also chose a glittered paper for the background of my calavera.

Here are my selections.

These glitter sheets are awesome. They already come with a sticky back, just peel and stick. (I purchased mine at a scrap book store)
Assemble your front piece. I added a butterfly behind my calavera. Sandwich your decorative paper behind your top piece of glass. I used a little stick glue to tack my calavera to my background paper. Then you are going to add your back piece of paper behind your front image and sandwich that in between your back piece glass.
Front Piece
Assemble your front piece. I added a butterfly behind my calavera. Sandwich your decorative paper behind your top piece of glass. I used a little stick glue to tack my calavera to my background paper. Then you are going to add your back piece of paper behind your front image and sandwich that in between your back piece glass.
Front Piece

Back Piece
 Next, you will open your Memory frame and insert your pendant "sandwich" inside. Be careful not to force your glass in too quickly. Your glass may crack or break.
Viola, instant one of a kind "Chica Style" pendant. Really, you can do this all under 10 minutes!

Next thing to do is add it to a necklace, or if you are really hardcore, make your own necklace!
Look here, two necklace in 1! Talk about stretching your dollar!
Look here, two necklace in 1! Talk about stretching your dollar!


Don't have access to Memory glass or frames? Here is your "99 cent" solution. (actually it is cheaper, but I like the phrase) You can also use the very cheap wooden cut outs they sell at your local craft store. They come in all shapes and sizes. All you have to do is drill a hole and I would seal with a varnish. You can collage, paint, add 3d embellishments. The sky is the limit!

Go ahead, Get Your Craft On!

Go ahead, Get Your Craft On!
A New Name & a Cool Guest Artist for September
No, not my name, but the name of our Scary Craft night!
(original post by Krissi Sanvick)A new name and a cool guest artist for September!
I wanted to let everyone know we had an AWESOME time making hats last month with DyMa Creations. A special thanks goes out out to Miss Dy for lending her expertise as a self-proclaimed Haberdasher and Sewing Mogul Extraordinare to the uninitiated! Check out a couple of the toppers made - these are by Rain and her mom, Kathy! I still owe a blog on last month's challenge, and to let you know this month's (an easy and super fun one inspired once again by Yoli), but that will get its own post - probably tomorrow.
And now for something completely different:
Y'know, we're not JUST "crafters" a term which conjures for most a vision of a housewife gluing stuff to other stuff (not that there's anything wrong with it). Given that the new wave of crafters / DIYers / punk artisans incorporate fine art techniques into their scrapbooking (and vice versa) and wire electronics into their clothing, the term "crafter" just doesn't do us justice.
Enter this month's guest artist Christian Cinder - better known on the grid as simply C!nder - with a new term for what to call people who hoard beads next to their Golden Liquid Acrylics and use Aleene's white tacky glue as often as they use gel medium: creators. Therefore, Scary CRAFT is changing the name of our monthly Sacramento crafting night to "NIGHT of the CREATORS" (Frankenstein imagery intended). However, please feel free to call yourself a crafter ... or an artist ... or a housewife who glues stuff to other stuff (that would be me).
Well don't click away just yet, 'cause C!nder is a giver, and he isn't done yet! Please join us on 4th Tuesday, September 23rd from 6-9 for NIGHT of the CREATORS* featuring a "skull bat 3D paper toy" make & take with C!nder (we're expecting quite a turn out, so an RSVP is strongly recommended! Either post a comment here or send us an e-mail: scaryCRAFT@gmail.com).
He'll bring printouts on cardstock of his skull bat image (no cost to you, but tips for the starving artist are appreciated), you bring some paper crafting stuff: craft knife, scissors, paints, your fave glue, embellishments, etc. While you assemble and embellish your very own skull bat, C!nder will give a 'down and dirty primer on making 3D versions of your own art.' Honestly, this is NOT to be missed!
More information will be posted (including a detailed supply list) next week. Until then, take a few minutes to check out C!nder's blog, his Flickr account, a review of his Hakubots on ToyCyte, and some of his art for sale on Scary-Art.com!
* Don't forget, the creations happen every 4th Tues from 6pm-9pm (except Nov/Dec) at:
Side Show Studios
5635 Freeport (Ste. 6)
Sacramento, CA
www.sideshowstudios.netCrafty Create-y (we'll have to work on that one) love,
your scribe, Krissi (and Yoli by proxy)

Tuesday, August 19, 2008
August Scary Craft Night Make and Take and Online Challenge
August Craft Night - Little Black Hats & More!
Hey Scary Kids!
The next Night of the CRAFTERS, Sacramento's original Craft Night is coming for you! On August 26 (a week from Tuesday), at the same Bat-time (6pm-9pm), same Bat-channel (Side Show Studios, Sacramento) we are pleased to present an embellished mini-hat make 'n' take by DyMa Creations!

Join us and make a unique "Little Black Hat" that reflects your style and personality while learning tips and tricks from the Haberdasher and Sewing Mogul Extraordinare herself! Kits are available (see below) or BYO stuff.*** Not sure what to pack in? You can get some ideas from the DyMa Creations Etsy store or view her Little Black Hats with homes. Don't wanna make a hat? That's OK - ya don't gotta. Just bring your crafty self, supplies for whatever you want to work on and a folding chair (if you have one) and join the glue sniffing. WARNING - you may leave covered in glitter.
***IMPORTANT: For this class, kits ABSOLUTELY MUST be reserved in advance. Please message us or comment below to reserve one or more of these kits (CASH ONLY PLEASE - price is dependent on embellishments chosen - payable to artist at time of class):
- $8-10: full kit (5½" hat form and your choice of embellishments)
- $5-7: embellishments only (BYO hat)
- $4: hat form only (BYO embellishments)
- oh, and of course, $0: no kit - BYO everything or craft on your own - no reservation needed!
See you at the crafting tables!
Online Tutorial & August Craft Challenge!
Hey Scary Crafters, it's Krissi again. La Snatchita and I have been a wee bit behind on our craft challenges, and we want to tell you that we know and we're deeply apologetic (psshhh!)
Well, my friends, I'm happy to say that the drought is over! Here is a tutorial from Jennifer Perkins of Craft Lab /Naughty Secretary Club brought to us via our own Sacred Snatch Designs.
Now, here is YOUR challenge:
- Create your own 'batik' decorative paper(s) using this technique
- Make something using the paper you just designed - anything is OK, ATC, mixed-media on canvas, envelope, card, paper your office, whatever.
- Post a photo of your masterpiece (along with a "before" shot of your finished paper) on your blog/website/Flickr/whatever account, then
- Post a comment on OUR blog with a link to your photo
- Complete all of this by Monday night, August 25th at 7pm PDT (10pm Eastern)
DRAW ON, SWEET CRAFTERS!
Winner, Winner, Carnita Dinner!
Between this blog and my other blog I re-post on Myspace, there were a total of 29 entries.
::Drum Roll Please::
And the winner of the Batik Muerto plaque is none other than.........
Sofia (sp) from Simply Strands!
Congratulations girly, email me your addy and I'll get it out to you in a jiffy!
Thanks everyone for playing, you all rock! For those of you who tried the technique, please send me a picture. I would love to see your creation!
Besos,
Yoli
Thursday, August 14, 2008
Easy Crayon Batik Technique Tutorial & Give Away!
I watched this technique on Jennifer Perkin's Craft lab show the other day. It looked so easy that I ran to my crayon box and got busy! Guess what? It was totally easy and I made a couple of goodies and have been getting requests to do a tutorial on this technique ever since! So with that, Tada......
Here you go, and on top of a technique, I am also throwing in a drawing for the item below. All you have to do is leave a comment and bam, your name goes into a drawing and the lucky winner will be notified for their mailing address. Sound fun? Of course it is! I will take comments through next Monday, August 18th, and will announce the winner on Tuesday. So, get your comments in and hey, tell a friend!
Materials you will need.
Black Acrylic Paint
Crayons
Paper
Water
Brush or Sponge
Paper Towel
Seriously, that is it! By the way, this is a GREAT project for the kiddies too.
Step 1. Start coloring! Use any pattern or design you want. I like vibrant colors, but you can use any color combination. I suggest applying a good amount of pressure on your masterpiece. The waxier, the better!
Completely cover your entire paper with your groovy artwork.
After your page is done, crumple your paper in a wad like the one below. Squish it good and hard, the more wrinkles, the better!
Next, you are going to spread your masterpiece out on a nonstick surface (or a protected table)
Pour some of your black paint in a container and add some water. I didn't measure, I just made it on the soupy side. Then you are going to get a sponge or brush and cover your masterpiece completely in the black paint wash.

Like This.

Next, before it dries, you are going to wipe off the excess paint with a paper towel.

Lay out to dry. (they dry pretty fast) Tada, you are done. You can use these papers as you like. Use them in everything; Altered Envies, Journals, ATC's, Decopauge, Cards, you name it, you can do eeet!


I love the organic look to it. It really does look like dyed batik, but without the dyes and mess!
So below is a little Dia De Los Muertos plaque I made with the batik papers. This will be my drawing prize. Just leave your comment below, and I will draw your name on next Tuesday!

Thanks again for stopping by and be sure to visit often!
Yoli
Tuesday, July 29, 2008
Recycled Business Envie Tutorial
It's time for another easy sleazy tutorial from your girl, La Sacred Snatchy! I was inspired to write this tutorial after participating in an altered Business Reply Envelope swap, hosted by my homegirl, Juli of Swap-bot. I have thrown away countless junk business reply envelopes that always annoyed the scrap out of me! Anyhoo, after altering just one envelope, I was hooked and now I am actually telling the peeps at my office to give me all their junk envies! I will never buy envelopes again and I have a something to do with all the scraps of paper I feel to guilty to throw out! It's a win, win, situation, I tell you! (Not to mention the "Green" aspect, either!)
So today, we are going to turn this hot mess,
all my bits and pieces of ephemera a.k.a. scraps of this and that,
all my bits and pieces of ephemera a.k.a. scraps of this and that,

and these basic supplies. (Junk Business Reply Envies, scissors, and glue sticks)

Into this! Wonderful artful pieces of mail to send to those you love!

I highly recommend a good quality glue stick. You don't want your masterpieces falling off en route to your lover or Sancho. (shhhh) You can actually use any glue, I just love glue sticks at the moment and I have even used them successfully gluing fabric to paper. (that is another tutorial in the works)
Anyhoo, cover the front of your envelope real good with glue. Especially the edges of your envelope. Note, if your envie has a window that is not covered. I simply stick a piece of paper on the inside of the envie, and when I get busy with my gluing, it will eventually adhere to the decorative papers I stick on the outside.

Then turn your glued envie face down on the back of your paper of choice and burnish real good. If you are using scraps , just lay your scraps all over your envie and burnish from there.

Like I said, burnish, or smoosh with your hands real good! Don't worry about trying to align your papers within the envie, because you can always cut around your envelope after gluing to remove any extra papers.
 I just cut around my envie. See how it looks all nice and even?
Ohhhhhhhhh, here is the fun part, Embellishing! Sky is the limit. For real, you can not screw up this project. Ok, well, maybe a little. Make sure your embellishments are flat and not bulky. You don't want them getting ripped off in the mailing process! I use pics, glitter glue, fabric, ribbon, rubber stamps, inks, crayons, oh who am I kidding, I use everything!
 Don't forget the backside either!
Tada............ Finito. For real, you can spend a whole lot of time on this project or you can whip one of these out in no time! I think this would be a great project for the kids too!


Please give this craft a try, and when you do, post a link to your artwork!
Viva La Arte!
Saturday, July 26, 2008
Senorita Spool Y Spool Doll Tutorial
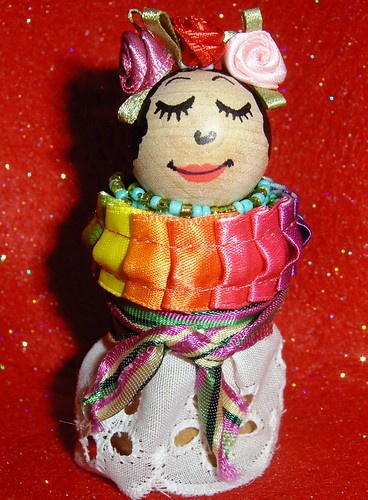
I was cruising my 10,000 blog subscriptions and I noticed my sisters in craft, Lauren of Goody- Goody, Tammi of Roxycraft and Missy of Crafty Carnival all posted a super sweet spool doll tutorial. Well guess what, I happened to have a vintage spool that a friend from one of my art groups gave me, and like a tweaker I finished this lil "Mija" around 3:30 am this morning! lol. Really, she didn't take me that long, but once I started, I couldn't stop!
Meet, Senorita Espool!
Isn't she cute? I had so much fun making this doll, and believe me, the possibilities are endless. All you need is a few scraps of this and that, and before you know it, a doll is born!
Take a look at this flickr group that show cases these spool dolls and clothespin dolls.
Here is the tutorial that I jacked from Missy who jacked it from Lauren. hee. But whatever you do, make sure you visit their blogs and add them to your favorites. Trust the Snatch, they are so worth your time!
I'm hijacking Lauren's blog for a minute to bring you this quick and easy spool doll tutorial! Of course, you can use this to make those ever popular clothespin dolls as well!


Supplies:

Different Size Wood Knobs for Heads (cheapest at Wal-Mart, but also available at any craft store)
Spools (Vintage, or craft store spools both work great!)
Wood Dowels to fit the holes in the knobs (I always purchase the variety pack at Wal-Mart so I always have the size I need.)
Paint, Brushes, paint pen in black
Clear Acrylic Sealer
Glue Gun (Optional)
Let's Get Started:
Place the knob on the dowel and I always secure it with a little bit of wood glue, all though white glue would work fine, or you skip the glue all together. But when I know I will be shipping the doll, it needs that added stability. Placing the knob-head on the dowel makes it easier to paint!
Cut the dowel down to about a 4 inch length or so. I use OLD scissors to score the dowel, and then just break it in my hand…. There’s no need to bring a saw into the house for this little project! J This is a good workable length, and we’ll cut the dowel down again later.
Now that the knob head is on the dowel, it’s time to paint the hair. Using acrylic paint, hold the head by the dowel and design your doll’s do! Once you’ve painted the hair, stick the dowel into the floral foam to let it dry. When painting the hair, I always like to look at my knob head and decide where the best place for the face would be. Sometimes there is an ugly spot, or the grain of the wood wouldn’t look nice. If you toll painted in the 80’s with your mom, like I did… this will be very nostalgic for you! LOL! Use your own judgment, but I find that it takes at least two coats for the hair to look grand. Let the hair dry.

Now that the doll hair is all dry, it’s time for clear acrylic sealer. I just take my whole floral foam block outside, and spray the doll heads all at once. Every sealer has different directions, so you’ll have to follow the directions on the sealer you choose. I use spray sealer because we always seem to have a can handy around here, and I like to do at least 2-3 coats.
Once the sealer is dry, it’s time to “paint” the face. Because the wood is knobs are dry, they suck the paint right up. When painting small details, like the face, the paint tends to run, and this is why you should seal the head BEFORE you paint the face. It took me HOURS to figure this out with my first round of dolls. I have very shaky hands, and so it’s a lot easier for me to use a paint pen than a detail brush and paint. But doing the face is the most fun part! So you do what you like!! I chose to make my faces like the 70’s Fisher Price Little People dolls. I did this for several reasons… it’s easy, I loved those toys, and I think this is a very 70’s kitschy crafty, so it lends well to that type of face!

Once your face is done, it’s time to match your knob-head to its spool body. I love the aesthetic of big head – little body. So I always try to match them up that way, but obviously, that’s not for everyone J So you do what you like! If you use a spool from the craft store, I always like to seal those with the sealer first. You can also use a vintage spool of thread
Once your body and head are matched up, it’s time for finishing details!! Place the head to the body, and make your final cut on the dowel. You’ll most certainly have to trim it down from the original 4”. I use a little glue to glue the head to the body for shipping reasons, but you can also leave it unglued, so it’s interchangeable! Wrap some vintage trim around the spool, stick it with an old pen and you’re done!!

Some optional finishes: add paper flowers or bows to the hair with a hot glue gun, trim a piece of felt to glue to the bottom of the spool for a nice finish, make a sad face for that grumpy person in your life, or a boy with a mustache! The possibilities are endless! Now that you are done! Take pics and add your dolls to the spool and clothespin doll flickr group!!
Footnote:
Since it was 2:30 in the a.m. when I started, I had to work with what I had. I didn't use the dowel because I was using round wooden balls that didn't have a hole in the bottom. No worries, I used E6000 and glued her head right on top of the spool! It worked. yay!
Sunday, June 8, 2008
Recycled Postcard and Mexican Tin Tooling Tutorial
Looky here, you get a twofer today! Yep, got mi own tutorial to share and a WONDERFUL tutorial given by Kristen of Pepper Paints!
First up, is making postcards out of all your junk mail and paper scraps. Truly, the possibilites are endless, and it also makes you feel good to know you are creating and recycling at the same time! I made the cards below for a few swaps, and had so much fun, I just wanted to share, because, well, that is how I roll, Chicas!
Materials:
Junk mail, catalogs,newspapers,bills, paper scraps, left over ephemera, etc
glue stick
scissors
card-stock (preferably recycled, from existing post card ads or cereal boxes and or packaging .
Directions: Really, do you need them? lol, cut away and get to gluing all over. Here are a few I made today!
One card is made from San Francisco handouts, maps and coupon book. Another one is made from a Nordstrom's catalog. I haven't shopped there in a while, but they have the best catalogs!

These two were made from paper scraps and I included quotes to give it a more mysterious element!

Ok, this is a given!
 Can you feel me? I like these because they are super easy to make, you can complete several at a time, and you can go crazy or keep it simple. Either way, they will still be the bomb, because they are handmade and ready to send out. There is a huge movement on hand written postcards and being that I am old school, I am really digging these trades!
Ok, and for the grand finale! I ran across this blog and I was floored at the simplicity and the bang this craft put out!
Mexican Tooling Project
(copied and pasted with Kristen's permission, of course)
*********************************************************************************
This weeks Unplugged Project is Metal. The long weekend threw me off a bit so I am posting a day late-but better late then never! This Mexican Metal Tooling project is super easy, no mess.

You will need some heavy aluminum-we cut cake pans apart-scissors, stack of newspapers, paint brushes, permanent markers. Optional materials list to follow.

Place your aluminum square on your newspaper stack and use the back of a paintbrush to draw a picture/design. You can flip your square over and draw on the other side too so that some of your drawing sticks out and some is concave.


Now use your permanent markers to color in your picture.


The next part took longer than anything. I punched holes in the corners and used jewelry wire to string the tiles together and tied them to a dowel rod. We hung some beads off the bottom for weight. This is optional but I think it really looks great. Because we used permanent markers I plan to hang this on our back patio but tonight could not find a single place to hang it to get a good photo. This was the best I could do.

Note–after cutting the pans up the edges are a bit sharp, you may want to use masking tape and tape the square down to the newspaper while working on it. Be careful!
Here is a photo I took this morning outside-looks a bit better!

How fabulous is that? I am already doing a progect (Big Ass Matchbox Shrine Swap) using her technique! Awesome. Please be sure to visit her inspiring page and tell her Snatchy sent you!
Subscribe to:
Posts (Atom)
 Stumble It!


 Posts
Posts

