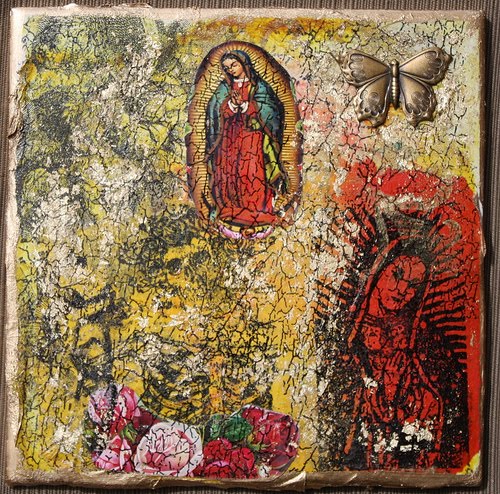
at my new blog sight!
click here, and add me while you are at it!
Wednesday, October 15, 2008
Sugar Skull Tutorial
Posted by Sacred Yoli at 11:31 PM 2 comments
Labels: class, day of the dead, dia de los muertos, sacred yoli, sugar skull, tutorial
Tuesday, October 14, 2008
New blog
Hey all, I just blogged about a beautiful opportunity.
Please visit my new blog and do subscribe, and/or follow. I will be posting there, from now on.
Thank You!
Yoli
Here is the linky!
Posted by Sacred Yoli at 9:15 AM 0 comments
Labels: be nice, love, sacred yoli
Tuesday, October 7, 2008
New Addiction! Drive by Random Acts of Kindness
A couple of weeks ago, I blogged about a swap I was hosting on Swap-bot. Well I am happy to say, it just started a couple of days ago, and already, I am getting amazing feedback from a couple of the chica's that dove right in. I only requested that people randomly drop off 3 pieces of art, notes, doodles, or whatever in random areas and take a photo of their deed. However, a couple of these ladies are already knee deep in their RAK addiction and have already dropped off a handfull of RAK's throughout their cities. They have also written to me about how much joy they are getting out of this, and have vowed to continue dropping off random goodness thruout. I opened up a flickr group so that everyone can share their experience and or partake in the challenge. You can find the group here. (please feel free to join and view photos and discussions)
I have yet to drop mine off, but I did make three collaged postcards with a note for the finder. My goal is going to be to drop them off at various places during 2nd Saturday's art walk here in Sacramento. Which brings me to the point of my blog....
I want to challenge each and every reader of this blog to practice one RAK. It doesn't have to be art, it can be a phone call, an extra tip, a letter, a one liner, anything. Trust me, you will get so much more out of it than the receiver. Some are even calling this excercise of good faith, theraputic, and I have to agree.
I remember a couple of years ago, my husband and I were trying to merge on the Bay Bridge's toll booth. We had gotten in the wrong line (fast track) and needed to scoot over to a booth that accepted cash. We had blinkers on, and were trying to make eye contact with anyone who would show mercy on us. We found a little clearance and were just about to merge onto the next lane when a car sped up and laughed at us as we tried to get in front of her. Well Karma stepped in because as they were looking back at us and laughing, she hit the car in front of her. "Ouch".
Another car stopped and let us get in front of them. We were so thankful, that at the toll booth, we paid for our toll and the car behind us. That particular RAK still feels good to this day.
Whoops, look at me, I am rambling! So yeah, do your RAK and let me know how it went. You can post here or at my flickr group. I would also like to challange all my Scary Art Collective ghoulies to participate with me.
Oh, and if you have the time and are in my city, do stop by our shows. We are participating in two shows.
Blood & Guts Do Sell
October 11, 6-10pm
Side Show Studios
Scarry-Art Collective Halloween Show
Do stop by and hollar at your girl!
Posted by Sacred Yoli at 7:24 PM 1 comments
Labels: 2nd saturday, art, challange, outsider, RAK, scary art
Sunday, October 5, 2008
Easy Encaustic Wax Tutorial. (You know how I do!)
Encaustic painting, also known as hot wax painting, involves using heated beeswax to which colored pigments are added. The liquid/paste is then applied to a surface — usually prepared wood, though canvas and other materials are often used.
The simplest encaustic mixture can be made from adding pigments to beeswax, but there are several other recipes that can be used — some containing other types of waxes, damar resin, linseed oil, or other ingredients. Pure, powdered pigments can be purchased and used, though some mixtures use oil paints or other forms of pigment.
Metal tools and special brushes can be used to shape the paint before it cools, or heated metal tools can be used to manipulate the wax once it has cooled onto the surface. Today, tools such as heat lamps, heat guns, and other methods of applying heat allow artists to extend the amount of time they have to work with the material. Because wax is used as the pigment binder, encaustics can be sculpted as well as painted. Other materials can be encased or collaged into the surface, or layered, using the encaustic medium to adhere it to the surface.
***********************************************************************************
Yeah, who has time for that, or for the mess? I know I don't, so lets get this party started, shall we?
Materials and supplies.
Natural Bees wax: You can find this at Michaels or Joanns in the candle section. Make sure you get clear, and because I like to save my "skrilla" use a coupon. They are always putting out weekly coupons.
Crayons: Here is where I don't skimp out. Crayola shoves in lots of pigment in their crayons. They are not that much more expensive than a generic brand. Trust me, they make a difference.
Quilting Iron: Again, use a coupon people! These run around 30.00. They are so worth it too, because they get super hot and they are small and great for small projects. Oh, and you can use them for quilting too.
Newspaper: Great for absorbing drips and cleaning your tool
Gift Wrap Tissue Paper: You know, the kind you dress up your gift bags with. Dollar store carries it, and so does the rest of america.
Gift Car, Collage, painting,tag,: anything you want to seal up. I sealed wood, paper, and canvas. For demonstration purposes, I am using a Christmas card.

Step 1: I like to get my iron nice and hot, and I set it on high. Be very careful, you can easily burn yourself. After it is nice and hot, I apply the iron directly on my slab of wax, till it starts dripping on my card. I let it drip all over

See the drips? Kinda looks nasty, but I won't even go there......
 After you have a fair amount of wax on your card, start rubbing your iron all around your card to melt and smooth out your wax droppings. Have fun, this is the most theraputic part, I can swirl around for hours. If you get to much on one side, you can remelt it and move it around.
Wanna be daring and add some color? Get your crayon and apply it to your iron the same way you did with your bees wax. Use your crayon sparingly! Crayolas put out lots of color and you depending on the size of your piece, you may only need one or two drops. Again, if you have too much color, you can always move it around by melting it and spreading it elsewhere

Here, I added about 4 different colors.

After your piece cools a bit, it is ready to buff out. Using your tissue paper,(thanks for the tip, Krissi, I agree this works best!) bunch it up and rub gently a few times over your piece, and you will notice a nice sheen. You don't have to do this step if you don't want too, but since I like my stuff shiny, I buff away. :-)

Here are three pieces that I sealed in wax. They are going to be part of my RAK Swap challenge that I blogged about previously. (click on link and join my RAK flickr group)
How easy was that? Oh, and you could really go crazy with this technique. try embedding small objects, glitter, tissue papers, anything! I swear, this is so much fun, you will be dreaming about sealing up anything. I may even seal my bills! haha. (I wish)
Anyhoo, if you enjoyed this tutorial, do tell a friend!

Whoops, lemme tell you about clean up. EAZY! While your iron is still hot, wipe off excess wax on newspaper, It will come right off and be just like new. I think this is way easier than cleaning out a crock pot full of wax and having those brushes full of wax.

Saludos!
Yoli
Posted by Sacred Yoli at 4:16 PM 5 comments
Labels: collage, encaustic, free, how to, mixed media, tutorial, wax


 Stumble It!


