Showing posts with label mixed media. Show all posts

Sunday, October 5, 2008

Easy Encaustic Wax Tutorial. (You know how I do!)

Before I get started on this super easy, fun, & addicting craft/art technique, I am going to list the a definition of the encaustic process. Don't let it scare you because you know I always have a "99 cent" solution!

Encaustic painting, also known as hot wax painting, involves using heated beeswax to which colored pigments are added. The liquid/paste is then applied to a surface — usually prepared wood, though canvas and other materials are often used.

The simplest encaustic mixture can be made from adding pigments to beeswax, but there are several other recipes that can be used — some containing other types of waxes, damar resin, linseed oil, or other ingredients. Pure, powdered pigments can be purchased and used, though some mixtures use oil paints or other forms of pigment.

Metal tools and special brushes can be used to shape the paint before it cools, or heated metal tools can be used to manipulate the wax once it has cooled onto the surface. Today, tools such as heat lamps, heat guns, and other methods of applying heat allow artists to extend the amount of time they have to work with the material. Because wax is used as the pigment binder, encaustics can be sculpted as well as painted. Other materials can be encased or collaged into the surface, or layered, using the encaustic medium to adhere it to the surface.

***********************************************************************************

Yeah, who has time for that, or for the mess? I know I don't, so lets get this party started, shall we?

Materials and supplies.

Natural Bees wax: You can find this at Michaels or Joanns in the candle section. Make sure you get clear, and because I like to save my "skrilla" use a coupon. They are always putting out weekly coupons.

Crayons: Here is where I don't skimp out. Crayola shoves in lots of pigment in their crayons. They are not that much more expensive than a generic brand. Trust me, they make a difference.

Quilting Iron: Again, use a coupon people! These run around 30.00. They are so worth it too, because they get super hot and they are small and great for small projects. Oh, and you can use them for quilting too.

Newspaper: Great for absorbing drips and cleaning your tool

Gift Wrap Tissue Paper: You know, the kind you dress up your gift bags with. Dollar store carries it, and so does the rest of america.

Gift Car, Collage, painting,tag,: anything you want to seal up. I sealed wood, paper, and canvas. For demonstration purposes, I am using a Christmas card.


Step 1: I like to get my iron nice and hot, and I set it on high. Be very careful, you can easily burn yourself. After it is nice and hot, I apply the iron directly on my slab of wax, till it starts dripping on my card. I let it drip all over


See the drips? Kinda looks nasty, but I won't even go there......

After you have a fair amount of wax on your card, start rubbing your iron all around your card to melt and smooth out your wax droppings. Have fun, this is the most theraputic part, I can swirl around for hours. If you get to much on one side, you can remelt it and move it around.


Wanna be daring and add some color? Get your crayon and apply it to your iron the same way you did with your bees wax. Use your crayon sparingly! Crayolas put out lots of color and you depending on the size of your piece, you may only need one or two drops. Again, if you have too much color, you can always move it around by melting it and spreading it elsewhere

Here, I added about 4 different colors.


After your piece cools a bit, it is ready to buff out. Using your tissue paper,(thanks for the tip, Krissi, I agree this works best!) bunch it up and rub gently a few times over your piece, and you will notice a nice sheen. You don't have to do this step if you don't want too, but since I like my stuff shiny, I buff away. :-)


Here are three pieces that I sealed in wax. They are going to be part of my RAK Swap challenge that I blogged about previously. (click on link and join my RAK flickr group)

How easy was that? Oh, and you could really go crazy with this technique. try embedding small objects, glitter, tissue papers, anything! I swear, this is so much fun, you will be dreaming about sealing up anything. I may even seal my bills! haha. (I wish)

Anyhoo, if you enjoyed this tutorial, do tell a friend!

Whoops, lemme tell you about clean up. EAZY! While your iron is still hot, wipe off excess wax on newspaper, It will come right off and be just like new. I think this is way easier than cleaning out a crock pot full of wax and having those brushes full of wax.


Saludos!

Yoli
Sunday, September 28, 2008

Rawkin Round Robins!

Omygosh!

I participated in the fastest Round Robin Art marathon ever! Ok, maybe not ever, but it was a 1st for me. I attended my monthly "Northern California Mixed Media Artist" class today. It is not really a class per se, but dang it if I don't learn something new each time, so to me, it is a class of deliciously inspired women and teachers.

Today we were instructed to each bring a sheet of watercolor paper and various images, inks,paints, images,trims, etc.

Once we got settled in, we all set up our work stations. A timer was set for 5 minute increments, and once it dinged, we had 5 minutes to get busy, and then pass it to our partner to the left. I believe there were about 8 or 9 of us. At the end of the round, we were the new proud owners
of a wonderful collaborative piece of art. We were all so hot and inspired that we did it twice!

Yup, I walked out of there with two completed pieces that were imprinted and created by a bunch of wonderful minds and spirits.


Here are two pieces. (hold on to your chonies!)


I started this piece with tearing a bunch of papers for the background. I love the romantic vintage feel to it.


This second piece I titled, "Buenas Noches"


I love that someone added a Tuscan villa scene. Perfecto!

Speaking of "Round Robins" I am participating in my very first Journal Round Robin. A few Chica's from Swap-botand I are just starting the process. I am making a total of 3 pages for this first book I rec'd the other day. This is one of my entries. (I am keeping the other two a secret, shhhhhhh)

I used collaged papers, inks, glitter, stickers and I hand painted the Chica. This page was inspired by a confessional made on the opposite page. I call this page "Free to Dream" Trust me, it is very fitting to the confessional. :D


Monday, July 14, 2008

Sacred Roll Call

Note to my readers: I copied and pasted this post from my myspace blog. The links may not work. I know, I know, why would I do this? Trust me, this was an old blog from before I started blogging like a big girl. Any future blogs will be started here and then copied and pasted to my myspace blog.

I just wanted to share this story with you..............

Ok, I am reposting this from last year. YES, I said last year! I just wanted to make sure I included all artists that are involved. I am turning the baton over to Melody of Sugarcube society. She is my homegirl that started the inspiration for this fundraiser. She is back at it again this year, and because she has connections with getting this bag the proper attention, I am turning over the bag to her. Please hit her up with a friend request on myspace to stay updated. (Of course I will be updating too)

Orginal Post:

Update number 3!

Sacred Bag is on it's way to the last artist in Texas. (Devine Dolls) from there it will be going to Arizona to pay a makeover visit to Kathy of Crafty Chica, before heading to Southern Cali and making it's way back north. Michele of fat thumbs sent me pictures and I am so excited. The bag is coming along beautifully, I can't wait to blast the finished product! Remember, this bag will be on auction for charity. (Diabetes) and I am hoping yall can help me pimp this out when the time comes to auction it off.

I was hoping to get the bag back by the 21st, but if we need an extra week, that is ok. My goal was to auction it off before our Diabetes walk on October 7th and I am still holding onto that hope, but we can still auction it off after, if we have too.

I am working on a press release to send out to local papers to try and get this auction and it's artist's some PR.

This bag started out as a disaster. I was putting it together, and felt that I really fawked it up and was ready to trash it. Rather than throw it away, I thought about putting the bag to an Artist Challenge and offered to send it out to someone who wants to save it and acutioning it off for charity. The response was so overwelming, that Michele. of Fat Thumbs, came up with the idea of letting everyone work on it. Thus the Sacred Bag Round Robin was created.

Salute!
*************************************************************
Artists involved.


Official Art of ASM

Crafty Chica

Ignition Girls

Art by Krissi

Fat Thumbs Originals

Alisa in San Diego

Artist Alexa

Divine Dolls

Mariah

Hella Crafty

Delores

Vidriosa

Papermoonies

Rain of Rain's Embellishments

Melody of Sugarcube Society


and of course, me, Sacred Snatchy


I am mailing it out to the farthest Artista back east, and then have it head west towards Califonia.

That means the lucky first Artist is Mariah in Florida.

Please remember only keep the bag for a few days maximum and then pass it on to the next Artist. Don't be shy about whoring out the inside as well. If you find that you can't or ran out of time, don't feel bad about it, just let me know so that I can tell you where to send it next.


When you are ready to send the bag to the next Artista, please e-mail me via Myspace so I can give you the next forwarding address.


I will include the list of names along with the bag, please initial next to your name when sending it off to the next Artista. Also, if you are choosing to include some Swag or a anything, please list the contents next to your name so that I can properly acknowledge your contributions. Don't forget to include your card!


Once again, thank you All so much for donating your precious time to this worthy cause. As a reminder, I will be auctioning off this fine bag here on Myspace where all proceeds will be going to our Diabetes fundraiser. (Click here for more info)

I truly think this bag will be very desirable with all this creative talent!

Again, my goal is to have this hot little bag back to me by September 21st, 2007. That is aprox. 39 days from now, so time is of the essence!Here is another link regarding our fundraising and our walk on October 7th.

Besos!

End>................................................

Haha, I wanted this done in 39 days! Oh well, I do believe the bag and swag was definitely worth the wait. I just got an awesome Guadalupe eyeglass case from Krissi. Thanks girl, You Rawk! FYI, this bag traveled over 7500 miles!
Ok, stay tuned boys and girls!

Wednesday, June 4, 2008

Country vs. City with a side of a Crafty Tutorial

I don't know why, but I have always had mad love for big cities. I grew up in a "bedroom" community right outside of San Jose, California. Being that most of my family actually lived in various parts of San Jose, I too, would claim San Jose, just because, to me, it sounded way more exciting than boring Campbell.

As a kid, I would love to visit San Francisco and Los Angeles. I always felt like people from SF and LA were smarter, savvier and just so different than plain ol me. I was 8 ok? lol. Seriously, I would dream of visiting exotic cities like Paris, London, Rome and New York. I knew from a young age, that I was destined to travel, and I would do anything necessary to see the world out there!

How I ended up in Sacramento is beyond me. lol. Actually, I followed my mother here and the older I got, the more I appreciated it's laid back attitude. Good place to raise my kids too, since Sacramento, at the time, was a little behind the times in peer pressure as it was in the bay area.

Although I love traveling to breezy beaches and tropical resorts, nothing relaxes me better than to vacation in a bustling city. Last time I was in NYC, I gasped at the prices of apartments. I looked at some real estate just for giggles, and couldn't believe what a closet cost! No yard, no space, just a box inside a building.

Then I came home to my corner of the earth, and I realized how lucky I am to have some space to roam. My husband's passion is our backyard. If he could have his way, we would live out in some big ol ranch with acres of land. My city is surrounded by small country towns where acreage is in abundance. But.........Nope, not me, I have to live close to the action and we settled on a home that has a big lot.

So after reading Madge's (aka The impatient blogger, aka Impatient Beader, aka Super Woman) blogs about her chickens, pig's and Amish country, she inspired me to take some pics of the hubby doing what he does best (outside the house) and share a bit of our piece of the country that sits behind a house in a city.

Welcome to Manzo's Organic Orchard.


Homegrown Cherries. We have three trees and this was the first year that brought us huge amounts of cherries!


Vine Ripe and ooooh so sweet!


Earth's bounty

We have two white Peach trees. We are expecting a huge peach bounty. Some of the limbs are already sagging to the ground from the weight of these lil peachy gems.

We also have a Galla apple tree. The apples, right now, are the size of ping pong balls.

A couple of years ago, my mother and I stayed at this wonderful bed and breakfast farm house outside of Cortona, Italy. They had a lemon tree in this huge old pot sitting smack in the middle of their yard. When I got home, I announced to Mando that I wanted a miniature lemon tree in a pot right smack in the middle of the yard. This will be the year that it will produce more than two lemons!


Proud Papa farmer in front of his fruit trees that he planted himself.


Man made Pond


What can I say, I had to bring a little swank into our orchard!

Ok, back to "Ms. Madge"
She is starting a series of Crafty videos. Not only does she go out of her way to make them entertaining, but she also actually teaches us something! What a concept! This latest video shows us the wonder of working with extra thick embossing enamel (UTEE) Check her out, and tell her your girl, Snatchy sent you!


Sunday, May 25, 2008

Glitter is Good.

For real, and you certainly don't have to take my word for it. Crafty Chica spells it out for Ellen, (silly Ellen)


But I also have back up! Yes, my girls from the Sacramento Craft Mafia are pictured below showing their love and support for Glitter. At our last meeting I hosted a Shrine tutorial with some of the left over Crafty Chica goodness from Craft Con. Not only were we making beautiful arte together, but we were doing it up "Green" style and recycling our materials! It was a win win situation! Just look at how happy my girls are!


Ellen, can you honestly deny the happiness of all these Chicas? Carry on................

Monday, May 19, 2008

Having fun with Fabric and My Sewing Machine

Lately, I have been having fun with my sewing machine. Thanks to Krissi and her patience, I have been giving it a whirl and have been having fun with small items. I am getting pretty good with the ATC's, Postcards and mini quilts. I have even made a few handbags and am currently working on two bags that I made the pattern from scratch! Those pics will be coming soon.
For now, I just wanted to share some of my sewing lessons with you, and although I have sooooooo much more to learn, I am having fun. I am even thinking of joining morsbags.com so I can do some drive by bag give aways! If you don't know about that website, check it out, it is really inspiring. I feel so ashamed to take bags from stores now, and find myself stuffing my handbag with items and saying no all together on paper or plastic!

My goal is to start making bags for myself and family, and hopefully in the process, will make bags good enough to pass out to random peeps!

But for now, here are a few pics for your review.

Salute,

Yoli


Springtime ATC Swap

Postcard Swap


A mini quilt I made a few weeks ago.


Clutch I made for Loan


Corozon fabric Postcard I mailed to a swap partner

La Virgen quilted postcard


These Postcards are so easy to make. I should do a tutorial!

Have a great week everyone!

Monday, February 25, 2008

Paper Dolls, Fabric Casa's and Big Blunders!

I, along with Krissi, recently joined the Mixed Media Artists of Northern Califonria. (That is a big name!) This wonderful group meets monthly, and these ladies RAWK. They welcomed us with open arms, sat us down and made us get busy with demonstrations, shared their tips and before we knew it, we were sucked in! These ladies come from Stockton, Vallejo, Folsom, Sacramento and other parts of the bay. These ladies are also committed. We couldn't believe all the talent sitting there at the table. For me, it was a little intimidating, but at the same time extremely motivating! Each month, they do different challenges and demos.

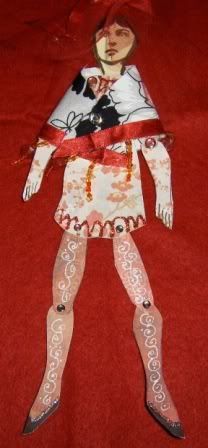
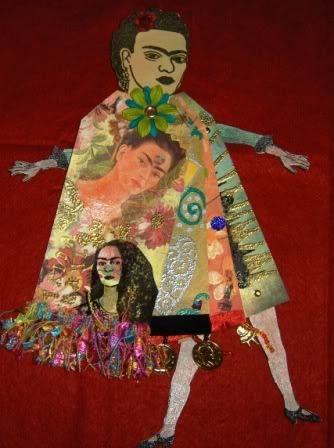
So during the stormy weather, these wonderful ladies joined together this past sunday, and I just had to snap some pics of what we all made. This month's challenge was a paper doll. I never made a paper doll, so I made two. My first one looked like a whore, but my second one, came out much better.

Whore:


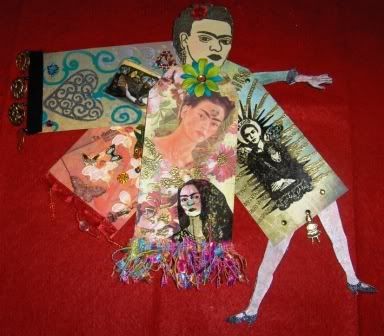
2nd attempt were a few artist tags I made, using my girl Frida, and I decided to make them into a doll.


here she is all "Spread" out.


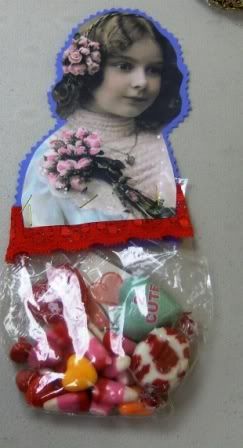
One of the ladies brought this one in from a swap. I thought it was genious, and I plan on making some with my own spin!

Can you just imagine the possibilities?

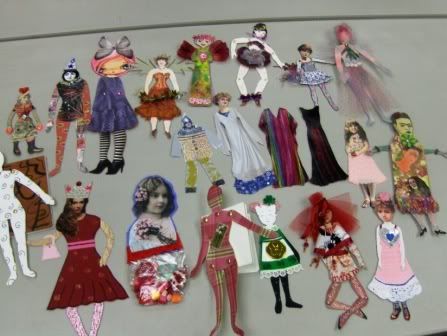
Here is a group photo of all the dollies that were turned in.


They were so much fun! I highly recommend giving them a try.

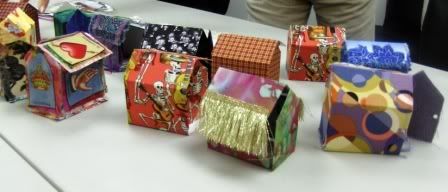
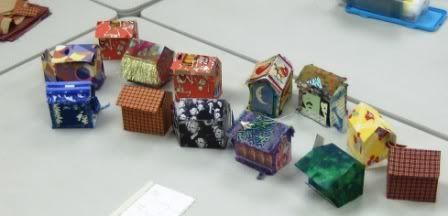
After we passed around are dollies, it was time to get busy and do a project. We were to make little houses out of ATC cards and fabric. Janene (sp) made it so easy. Her pattern was super simple and we made them in no time.

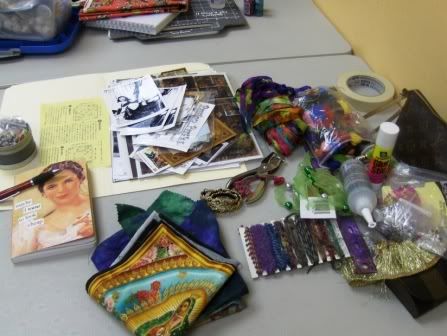
Here is a pic of all the supplies I took. (I tend to go overboard, because I only needed to bring like 3 items)


This is what we came up with.

Mine is with the gold trim, Krissi's is the one with the Loteria card.


How cute are those? We only constructed them at the meeting, but were told to take them home and embellish them. The inside's are blank, so we have lots of work to do. When I finish mine, I will post it up.

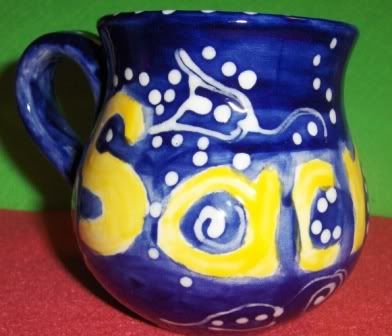
Ok, comedy time. Be nice, but remember I told you Sharon took me to a pottery place for my birthday? Well we finally picked up our pieces. LMAO. Ok, first let me disclose.............. I have mad respect for ceramic artists, mmmkay? Ceramic paint all looks the same to me, and I didn't know that you seriously need to really, really coat and triple coat your paints. I did this blindly, and hoped for the best. My kid told me I oughtta be ashamed of myself. hmmmph, I would like to see him try it.
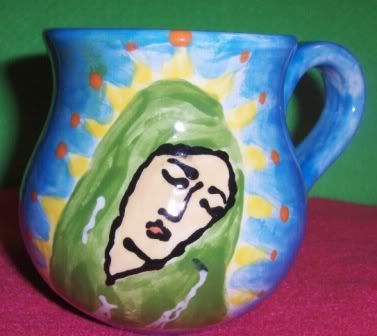
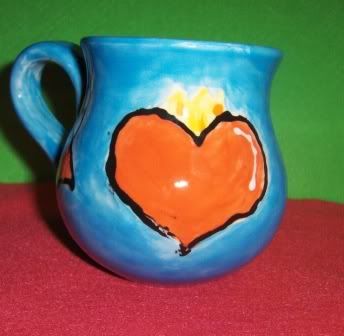


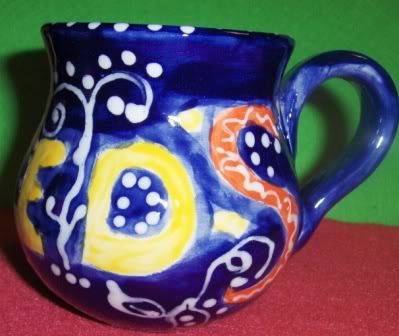
Mug 2


Kathy, you know that blog you just did about blunders? Well here are two big ones for you! Top that! haha.