Tuesday, July 29, 2008

Recycled Business Envie Tutorial

It's time for another easy sleazy tutorial from your girl, La Sacred Snatchy! I was inspired to write this tutorial after participating in an altered Business Reply Envelope swap, hosted by my homegirl, Juli of Swap-bot. I have thrown away countless junk business reply envelopes that always annoyed the scrap out of me! Anyhoo, after altering just one envelope, I was hooked and now I am actually telling the peeps at my office to give me all their junk envies! I will never buy envelopes again and I have a something to do with all the scraps of paper I feel to guilty to throw out! It's a win, win, situation, I tell you! (Not to mention the "Green" aspect, either!)

So today, we are going to turn this hot mess,
all my bits and pieces of ephemera a.k.a. scraps of this and that,


and these basic supplies. (Junk Business Reply Envies, scissors, and glue sticks)


Into this! Wonderful artful pieces of mail to send to those you love!


I highly recommend a good quality glue stick. You don't want your masterpieces falling off en route to your lover or Sancho. (shhhh) You can actually use any glue, I just love glue sticks at the moment and I have even used them successfully gluing fabric to paper. (that is another tutorial in the works)

Anyhoo, cover the front of your envelope real good with glue. Especially the edges of your envelope. Note, if your envie has a window that is not covered. I simply stick a piece of paper on the inside of the envie, and when I get busy with my gluing, it will eventually adhere to the decorative papers I stick on the outside.

Then turn your glued envie face down on the back of your paper of choice and burnish real good. If you are using scraps , just lay your scraps all over your envie and burnish from there.
Like I said, burnish, or smoosh with your hands real good! Don't worry about trying to align your papers within the envie, because you can always cut around your envelope after gluing to remove any extra papers.
I just cut around my envie. See how it looks all nice and even?

Ohhhhhhhhh, here is the fun part, Embellishing! Sky is the limit. For real, you can not screw up this project. Ok, well, maybe a little. Make sure your embellishments are flat and not bulky. You don't want them getting ripped off in the mailing process! I use pics, glitter glue, fabric, ribbon, rubber stamps, inks, crayons, oh who am I kidding, I use everything!Don't forget the backside either!

Tada............ Finito. For real, you can spend a whole lot of time on this project or you can whip one of these out in no time! I think this would be a great project for the kids too!

Please give this craft a try, and when you do, post a link to your artwork!
Viva La Arte!

Crafty Chica Products Available August 1st!

Posted for my friend, Kathy. Tell a friend! I have seen and played with these products, trust me, you won't be disappointed. Muey sparkley, and a whole lot of fun. Just her glitters alone, stand on their own!


Coming August 1st! Oh jeepers, that is in TWO and a half days!

Will you help me spread the word? My husband and I have been making art for 18 years and selling it, and sharing ideas on my CraftyChica. com web site for other people to make art too.


In April 2007, we were approached by one of the largest craft manufacturers to design our own product line based on the web site and our artwork. There are lots of cool things - shrine kits, holographic glitters, etc...some items even have some multi-culti flair!

A good sign; The product line just won the Innovations Best in Show Award for General Crafts at the Craft & Hobby Trade Show last week!

Here are the store locations that will be carrying it!

Thank you for all your support over the years, it means so much!!!! and thank you to Michaels and Duncan Enterprises making this happen!

Kathy
CraftyChica. com

Saturday, July 26, 2008

Senorita Spool Y Spool Doll Tutorial

I was cruising my 10,000 blog subscriptions and I noticed my sisters in craft, Lauren of Goody- Goody, Tammi of Roxycraft and Missy of Crafty Carnival all posted a super sweet spool doll tutorial. Well guess what, I happened to have a vintage spool that a friend from one of my art groups gave me, and like a tweaker I finished this lil "Mija" around 3:30 am this morning! lol. Really, she didn't take me that long, but once I started, I couldn't stop!

Meet, Senorita Espool!
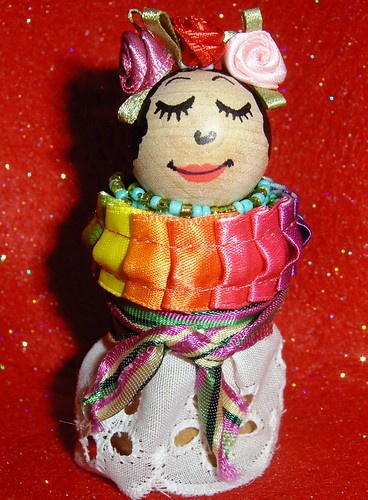


Isn't she cute? I had so much fun making this doll, and believe me, the possibilities are endless. All you need is a few scraps of this and that, and before you know it, a doll is born!

Take a look at this flickr group that show cases these spool dolls and clothespin dolls.

Here is the tutorial that I jacked from Missy who jacked it from Lauren. hee. But whatever you do, make sure you visit their blogs and add them to your favorites. Trust the Snatch, they are so worth your time!

I'm hijacking Lauren's blog for a minute to bring you this quick and easy spool doll tutorial! Of course, you can use this to make those ever popular clothespin dolls as well!

P1012090

Supplies:

P1012079

Different Size Wood Knobs for Heads (cheapest at Wal-Mart, but also available at any craft store)

Spools (Vintage, or craft store spools both work great!)

Wood Dowels to fit the holes in the knobs (I always purchase the variety pack at Wal-Mart so I always have the size I need.)

Paint, Brushes, paint pen in black

Clear Acrylic Sealer

Glue Gun (Optional)

Let's Get Started:

Place the knob on the dowel and I always secure it with a little bit of wood glue, all though white glue would work fine, or you skip the glue all together. But when I know I will be shipping the doll, it needs that added stability. Placing the knob-head on the dowel makes it easier to paint!

Cut the dowel down to about a 4 inch length or so. I use OLD scissors to score the dowel, and then just break it in my hand…. There’s no need to bring a saw into the house for this little project! J This is a good workable length, and we’ll cut the dowel down again later.

Now that the knob head is on the dowel, it’s time to paint the hair. Using acrylic paint, hold the head by the dowel and design your doll’s do! Once you’ve painted the hair, stick the dowel into the floral foam to let it dry. When painting the hair, I always like to look at my knob head and decide where the best place for the face would be. Sometimes there is an ugly spot, or the grain of the wood wouldn’t look nice. If you toll painted in the 80’s with your mom, like I did… this will be very nostalgic for you! LOL! Use your own judgment, but I find that it takes at least two coats for the hair to look grand. Let the hair dry.

P1012081

Now that the doll hair is all dry, it’s time for clear acrylic sealer. I just take my whole floral foam block outside, and spray the doll heads all at once. Every sealer has different directions, so you’ll have to follow the directions on the sealer you choose. I use spray sealer because we always seem to have a can handy around here, and I like to do at least 2-3 coats.

Once the sealer is dry, it’s time to “paint” the face. Because the wood is knobs are dry, they suck the paint right up. When painting small details, like the face, the paint tends to run, and this is why you should seal the head BEFORE you paint the face. It took me HOURS to figure this out with my first round of dolls. I have very shaky hands, and so it’s a lot easier for me to use a paint pen than a detail brush and paint. But doing the face is the most fun part! So you do what you like!! I chose to make my faces like the 70’s Fisher Price Little People dolls. I did this for several reasons… it’s easy, I loved those toys, and I think this is a very 70’s kitschy crafty, so it lends well to that type of face!

P1012083

Once your face is done, it’s time to match your knob-head to its spool body. I love the aesthetic of big head – little body. So I always try to match them up that way, but obviously, that’s not for everyone J So you do what you like! If you use a spool from the craft store, I always like to seal those with the sealer first. You can also use a vintage spool of thread

Once your body and head are matched up, it’s time for finishing details!! Place the head to the body, and make your final cut on the dowel. You’ll most certainly have to trim it down from the original 4”. I use a little glue to glue the head to the body for shipping reasons, but you can also leave it unglued, so it’s interchangeable! Wrap some vintage trim around the spool, stick it with an old pen and you’re done!!

P1012092

Some optional finishes: add paper flowers or bows to the hair with a hot glue gun, trim a piece of felt to glue to the bottom of the spool for a nice finish, make a sad face for that grumpy person in your life, or a boy with a mustache! The possibilities are endless! Now that you are done! Take pics and add your dolls to the spool and clothespin doll flickr group!!

Footnote:

Since it was 2:30 in the a.m. when I started, I had to work with what I had. I didn't use the dowel because I was using round wooden balls that didn't have a hole in the bottom. No worries, I used E6000 and glued her head right on top of the spool! It worked. yay!

Do give this lil project a try, it is so much fun! Oh, and be sure to check out Pimp Stitch. They have the coolest patterns for sale and for a limited time, they are giving away a few adorable stitch patterns. Andale!

Tuesday, July 22, 2008

Pictures, Pimpages, Crafts, Appearances and Tutorials!

Thanks for coming back and checking on me from time to time. I have been sitting on this blog way too long. I have some Crafty and Artsy homies I want to pimp out and share with you. These chicas have mad skills and it is such a shame to keep them all to myself, ya know? So lets get this party started!

First Chica up for blast, is my friend Cyndi of Santa Clarita Craft Lab. She has been crafting it up for a while and she just recently opened her very own Craft Lab down in Santa Clarita California. Any of you Sur Califa Chicas should go check her out. She has lots of wonderful classes to choose from and I really hope to make it down there sometime soon.

Anyhoo, her and I did a private swap on Swapbot. You know, to get her feet wet, sucker her into the Swapping vortex that I am so hopelessly part of. Hehe, I think it worked too, check out what she sent me. Can you say SCORE? Everything is handmade by Cyndi.


Here is her Shrine to Che Guevera. How hardcore is that? She even made little Che's out of all the matches in the box. Fantatico!

This here little gem of a shrine is made by my girl Alisa. The challenge was to make a shrine out of bottle caps. I like how she stacked two together to make a freestanding shrine. She also hooked it up with a healthy dose of glitter and her trademark, sequins!
These next two pics are from my homie "Altered Rose" The challenge was to make two items out of recycled materials. She really took this swap to heart and blew my mind. The pic below is a Shrine made from a jar using a vintage photo of a boy. I really like how nostalgic and old school it is. So cute, makes me want to create a swap using this medium!
I thought she did a great job on this necklace. She used a recycled necklace she bought at a garage sale, a toy bunny, and a TWIG, for Gawd's sake! Reminds me of an old toy from way back in the day. I can so see this piece in a shadow box Shrine.
This is another bottle cap shrine made for me by my partner in Swapbot. I love the simplicity and creativity of it. So delicate looking.

Ok, how awesome is this matchbox shrine? I received this from my partner, Mickeymoosies of Swapbot. I thought she did a banging job. The colors, the details, everything, so beautiful!

But wait, there are more homegirls I want you to check out! Do stop and visit my girl, Lisa of Willis Kids

She offers up a tutorial on paper cutting. Her work is incredible. Truly an art form in itself, don't ya think? She is always posting pics of her latest cut outs and she paints and illustrates too. So much talent!

Ok, this is a recent find. I found her a few months ago. Her name cracked me up, but after snooping around her pics, I was taken aback of her talent and creativity. WOW. Meet my girl of Borderbaby Creations!

Look at her profile pics, WOWZA!

Alas, I never get tired of pimping out my girl Kathy, I just wanted to put it out there, that La Reyna, Crafty Chica, is taking her show on the road to promote her much awaited craft line at a Michaels near you.

She will be in my barrio on August.

Friday, August 22, 6 – 8 p.m.
3691 Truxel Rd., Sacramento CA 95834-3604
(916) 928-9777

Come out with us and show her your love!

Monday, July 21, 2008

Yes Homegirl, There is a Craft Night Tomorrow!

Fear not, fellow craftistas! We will be crafting with abandon tomorrow (Tuesday) evening from 6-ish to 9-ish at Side Show Studios!

Your lovely hostesses have decided to forego the challenge and the tutorial portions of our program, and have cleared the entire evening's schedule so that you, dear crafters, can focus on your projects in earnest! (Actually, Krissi was under the weather and Yours truly has been working like a dawg, so we were unable to update the blog and pimp out the features in the manner they deserve.)

So, without further ado....

NIGHT OF THE CRAFTERS (a B.Y.O.C. event*)
presented by Scary CRAFT and Side Show Studios
June 22nd (and every 4th Tuesday), 6:30 to 9pm
Side Show Studios
5635 Freeport, 6 - Sactown
(adults and mature teens only please - thank you for helping to give our Mommy-members the night "off")

*bring your own crafts ( and chair).

Thursday, July 17, 2008

A Day of Frida, Shopping, Arte and Crafts Galore

Ok, pobrecita, Frida, I had no idea she wore butt huggers!

So last month, ( I can't believe it has almost been a month already) Krissi and I jetted on over to the MOMA in San Francisco to A, celebrate Krissi's 32nd birthday, ::cough, cough::(she is six months older than me. Trust me, she loves to point this out) and B, Go see our girl FRIDA!
I know, I know, I talk about her all the time, but hey, what can I say, she's tight like that.

Anyhoo, if you get a chance, that show is running through the end of September and it is so worth the visit. I am even more in love with her paintings and her humor! OMG, this woman knew how to get her clown on, mmmkay? She was sick and twisted just like me! Ayeeeeeeeee!

I tried to take some pictures, but trust me, they had regulators ALL over the place, and I wasn't about to get bounced out of there before getting my fair share of Frida. I did however gank a whole bunch of postcards and programs! :-).

Hey, I look at trash with a whole new perspective. I feel it is my small contribution to being green, because the Santos know I have done my share of waste and then some. I am working on being better though. I am forever sifting through my trash and telling my friends and neighbors to give me their empty pasta and cereal boxes. (Great for book covers and postcards)

Ok, back to our awesome dia.

After our tour de Frida, we went to the gift shop where we got suckered into buying all kinds of Frida gear. I walked out with postcards, Frida paper dolls, stickers, a children's Frida Coloring book and some cards. Krissi bought a gang of gear too.

From there, we were STARVING, so we headed out to the Mission. This is Krissi's old stomping ground and she took me on a serious stroll down memory lane. I got to see "her" Mission, lemme tell you, it was bright, colorful and beautiful. Reminded me of my days back in San Jo.

We got our grub on at this taqueria, and then we checked in an awesome bakery. Remember those horns, Girl? AWESOME.

We also peeped inside Dog Eared Books, one of my favorite stops, followed by visiting this this cool little shrine, voodoo store. (I forgot the name) I bought some resin incense. I love the smell of frankincense.

After a few more blocks, we headed back to Krissi's ride and drove to Berkeley, for a quicky stop at Paprus They have a great selection of hand dyed and specialty papers. I am telling you, we were on a roll. From there, Krissi took me on a cruise down Telegrah for some herbal brownies. I AM KIDDING!. haha. I told Krissi out of all the times I had been to Berkeley, I never took the time to check out the famed Telegraph Avenue. She told me that was a complete shame and took me out for a drive by. Thank you Krissi!

From there we started our descent back home, but of course, we spied a Michael's craft store on the way, and we just couldn't pass by without stopping, right? lol

I tell ya, we got our shop on and then some. We left at 9 am and didn't get home till about 10:30 pm. It was such a great day and I really wanted to share it all with you.

After all that Fridaliciousness, I became inspired and had a lot of swaps to complete. Guess what who I sent out to all my partners?.....................

Picture time.........

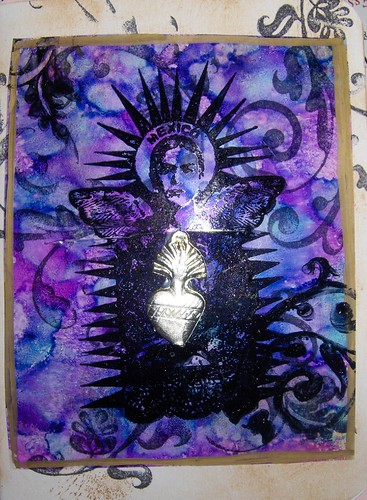
this was a card I made for Krissi's birthday. It was made of recycled materials, and alcohol inks. (My latest and current favorite medium)


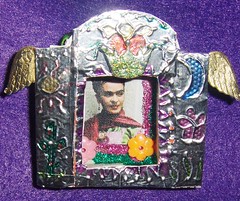
This was a small matchbox shrine I made for my partner. It was an actual Frida themed project. I h

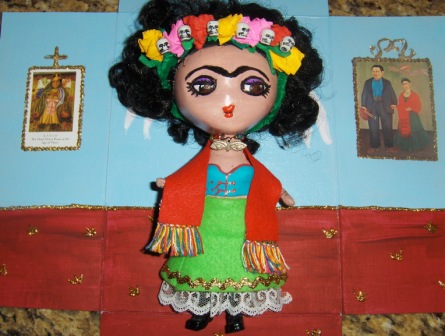
This is an oldie but goodie, I made this doll last year for a fundraiser. She is an altered doll, that I hand panted and dressed up. She even came with a back brace and her body cast was made out of polymer clay. I altered the box she came in to look like one of her rooms.
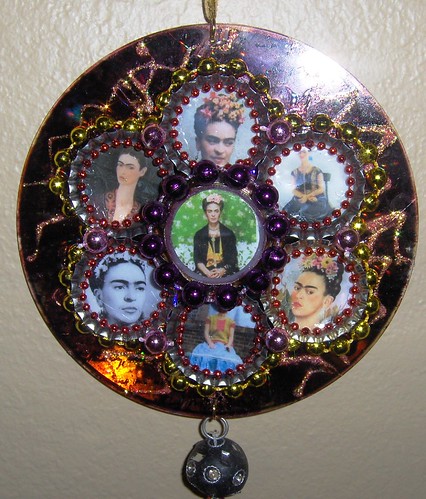
I made this ornament for a recycled project. I have to still give it to my partner and since she lives in town, I plan on delivering it to her. I used alcohol inks and recycled cd's, bottlecaps and beads and charms.
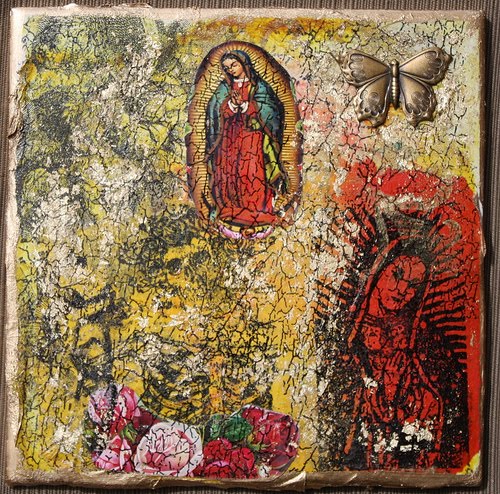
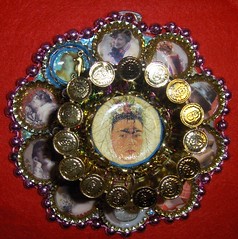
This was made for a altered CD swap. I learned these techniques from the wonderful Cyndi. She tought us this class on board the Crafty Chica Cruise earlier this year. By the way, the Cruise in happening next march. If you are looking for a quick retreat of Crafts, Chica's and good food, be sure to join us. I will be teaching a class on next year's cruise.

The next two pics are ATC's I made for another swap. (Yes, I am a swap addict)


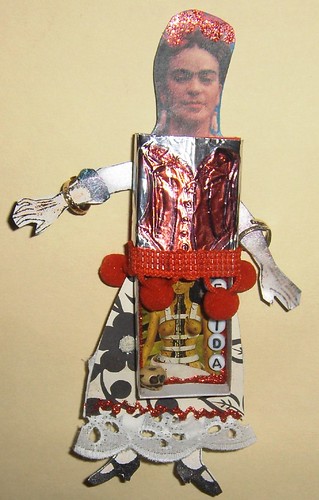
This last picture is a Frida matchbox shrine paper doll I made for Cyndi of Santa Clarita Craft Lab. Good Gawd, wait till you see what she sent me. (stay tuned)
and that concludes your daily dose of Frida. hee. My next blog will be a few features, tutorials, and upcoming events. be sure to check back.

Orale Pues,

Yoli

Monday, July 14, 2008

Sacred Roll Call

Note to my readers: I copied and pasted this post from my myspace blog. The links may not work. I know, I know, why would I do this? Trust me, this was an old blog from before I started blogging like a big girl. Any future blogs will be started here and then copied and pasted to my myspace blog.

I just wanted to share this story with you..............

Ok, I am reposting this from last year. YES, I said last year! I just wanted to make sure I included all artists that are involved. I am turning the baton over to Melody of Sugarcube society. She is my homegirl that started the inspiration for this fundraiser. She is back at it again this year, and because she has connections with getting this bag the proper attention, I am turning over the bag to her. Please hit her up with a friend request on myspace to stay updated. (Of course I will be updating too)

Orginal Post:

Update number 3!

Sacred Bag is on it's way to the last artist in Texas. (Devine Dolls) from there it will be going to Arizona to pay a makeover visit to Kathy of Crafty Chica, before heading to Southern Cali and making it's way back north. Michele of fat thumbs sent me pictures and I am so excited. The bag is coming along beautifully, I can't wait to blast the finished product! Remember, this bag will be on auction for charity. (Diabetes) and I am hoping yall can help me pimp this out when the time comes to auction it off.

I was hoping to get the bag back by the 21st, but if we need an extra week, that is ok. My goal was to auction it off before our Diabetes walk on October 7th and I am still holding onto that hope, but we can still auction it off after, if we have too.

I am working on a press release to send out to local papers to try and get this auction and it's artist's some PR.

This bag started out as a disaster. I was putting it together, and felt that I really fawked it up and was ready to trash it. Rather than throw it away, I thought about putting the bag to an Artist Challenge and offered to send it out to someone who wants to save it and acutioning it off for charity. The response was so overwelming, that Michele. of Fat Thumbs, came up with the idea of letting everyone work on it. Thus the Sacred Bag Round Robin was created.

Salute!
*************************************************************
Artists involved.


Official Art of ASM

Crafty Chica

Ignition Girls

Art by Krissi

Fat Thumbs Originals

Alisa in San Diego

Artist Alexa

Divine Dolls

Mariah

Hella Crafty

Delores

Vidriosa

Papermoonies

Rain of Rain's Embellishments

Melody of Sugarcube Society


and of course, me, Sacred Snatchy


I am mailing it out to the farthest Artista back east, and then have it head west towards Califonia.

That means the lucky first Artist is Mariah in Florida.

Please remember only keep the bag for a few days maximum and then pass it on to the next Artist. Don't be shy about whoring out the inside as well. If you find that you can't or ran out of time, don't feel bad about it, just let me know so that I can tell you where to send it next.


When you are ready to send the bag to the next Artista, please e-mail me via Myspace so I can give you the next forwarding address.


I will include the list of names along with the bag, please initial next to your name when sending it off to the next Artista. Also, if you are choosing to include some Swag or a anything, please list the contents next to your name so that I can properly acknowledge your contributions. Don't forget to include your card!


Once again, thank you All so much for donating your precious time to this worthy cause. As a reminder, I will be auctioning off this fine bag here on Myspace where all proceeds will be going to our Diabetes fundraiser. (Click here for more info)

I truly think this bag will be very desirable with all this creative talent!

Again, my goal is to have this hot little bag back to me by September 21st, 2007. That is aprox. 39 days from now, so time is of the essence!Here is another link regarding our fundraising and our walk on October 7th.

Besos!

End>................................................

Haha, I wanted this done in 39 days! Oh well, I do believe the bag and swag was definitely worth the wait. I just got an awesome Guadalupe eyeglass case from Krissi. Thanks girl, You Rawk! FYI, this bag traveled over 7500 miles!

Ok, stay tuned boys and girls!

Friday, July 11, 2008

San Francisco and Sacramento events this weekend!

I have been blog constipated and have been working on a couple, until then, I wanted to blast these events. All are going to be so worth the drive!

Copied and pasted from Rain's blog.

This weekend is full of fantastic events for local artists and art lovers!

First up: Renegade!

Tons of fun things to see and buy! The ever talented Katie from the Sac Craft Mafia will be there... She's been sewing up a onesie storm in preparation for the show! Miss Amy of Peptogirl Industries & Pimp Stitch will also be there with plenty of terrific button necklaces and stitch patterns to purchase! Please stop by & say hi if you're in the area!

Next: Curious Band of Artists

The artists of the Scary Art Collective will be presenting their book, "Curious Band of Artists" at the Brick House Gallery (2837 36th Street -On the corner of 36th & Broadway) in Sacramento. This is the perfect opportunity to collect their incredible artwork without having to break the bank! ;)

And Finally: Park Your Art!

Walk the 2nd Saturday Grid and Rain at McMartin Realty! She will be there with fellow Mafiosa, Sophia selling fun, funky and eclectic jewelry! Hope to see the locals there! ;)

All in all, it looks like it's going to be a fun weekend for the Northern Californian art & craft aficionados! Hopefully the smoke won't keep you from getting out and about!

Monday, July 7, 2008

Sacramento Craft Mafia's Craft Along

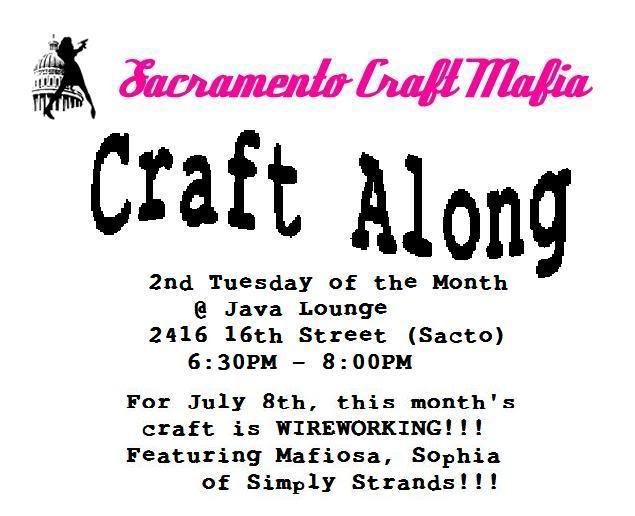
Wowee, it has been a minute since I have had time to blog! Stay tuned, I have a couple of crafty tutorials up my sleeve, but in the mean time, if you are in the Sacramento area tomorrow, my Sacramento Craft Sisters are hosting a delicious Craft Along!

Hey Sacramento!

It's July and time for another exciting SACRAMENTO CRAFT MAFIA Craft Along!

Want to meet your local MAFIA? You wanna see how we get down with some serious (okay, not really serious!) CRAFTING?

Head over to Sacramento's hippest anti corporate coffee haven, THE JAVALOUNGE this tuesday, July the 8th.

Craft Along with SCM is every second tuesday of the month, at 7pm at JAVALOUNGE!

JavaLounge is the host with the most with tasty REAL coffee, eats, art, and a super creative atmosphere.

For July, your Mafiosa of the month is the amazing Sophia, of Simply Strands. Sophia has taken the Mafia and Sacramento by storm with her beautiful, creative handmade jewelry. She has a fun blog you can visit by clicking HERE.

She will be doing a live craft demo, showing all of us some of her WIRE WRAPPING techniques. Make something pretty and handmade for yourself or someone you love this summer and discover technique, fun and friends.

All are welcome, and there is no charge. Because we are the CRAFT MAFIA, we will be providing some basic tools and supplies, but invite you to bring whatever beads you would like to work with as well as basic jewelry making tools.

And, hey, if the wire working thing is NOT your thing, come anyway, and bring whatever YOU like to work on! All crafts are welcome!